VDS fails to claim a disk
Are you getting a virtual disk service error while attempting to run DiskPart? Despite the fact that it can be very frustrating, this issue is luckily easy to fix. In this essay, I'll walk you through how to resolve this problem. This is a technical article for virtual computer users. But first, a few definitions for virtual operating systems in case you're not familiar with them.
Article content:
- What is Virtual Disk Service?
- Why are you getting a Virtual Disk Service error?
- How to fix VDS fails to claim a disk issue?
Ready? Let's read!
A virtual machine is an electronic duplicate of a real computer (VM). Since virtual machine software may run programs and operating systems, store data, connect to networks, and carry out other computer functions, it needs maintenance like upgrades and system monitoring. The simultaneous use of many operating systems on a single piece of hardware is the main purpose of virtual machines.
The full contents of a computer's hard drive can be stored in a disk image file format called a virtual hard disk (VHD). The current hard drive's data and structural components are replicated by the disk image, often known as a virtual machine (VM). The VHD is a backup copy of your disk drive, which is important to remember.
What is Virtual Disk Service?
A Windows service called Virtual Disk Service controls and offers data on virtual drives. Many disk administration activities, such establishing or expanding a volume, call for this service.
Each storage device vendor developed a unique program to install and manage their devices at the time of Windows 2000. Users must thus utilize distinct programs if they have several storage devices on their computer system. This made it challenging to handle disks and partitions.
In order to solve the management issue, Windows Server 2003 introduced the Virtual Disk Service (VDS). VDS is a collection of application programming interfaces that provide a uniform interface for disk administration through the Disk Management snap-in, DiskPart command-line tool, and DiskRAID command-line tool.
To handle diverse storage devices, VDS does away with the requirement for several storage apps. Instead, the same compatible storage application may be used to manage any device with a VDS hardware provider.
Why are you getting a Virtual Disk Service error?
There are a few different reasons why you may be getting a Virtual Disk Service error.
- The service not being active is the most frequent cause.
- The VDS registry key's security descriptor being damaged is another frequent problem. You could experience this if you recently installed or removed a third-party storage program.
- It's possible that the VDS dynamic-link library (DLL) is broken or missing. Malware or a virus are typically to blame for this.
- VDS is not compatible with the storage device.
- You lack the necessary authorizations to control the storage device.
- Another approach is using the storage device.
How to fix VDS fails to claim a disk issue?
If you see the following problem while verifying the DiskPart clean command on the system drive, the following fix is for you:
“Virtual Disk Service error: Clean is not allowed on the disk containing the current boot, system, pagefile, crashdump or hibernation volume.”
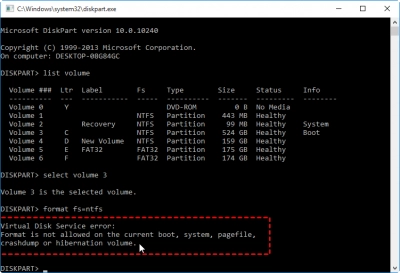
Your attempt to clear the system disk is what led to this problem. On the current boot, system, pagefile, crashdump, or hibernation drive, you cannot use the DiskPart clean command. You will need to use EaseUS Partition Master to create a bootable disk in order to correct this mistake and correctly perform the DiskPart clean command. This will enable you to wipe your system partition and start your computer from external media.
The steps are as follows:
- Make a disc or hard drive. You will need storage media, such as a USB flash drive or CD/DVD disc, to make a bootable EaseUS Partition Master disk. Connect the device properly to your computer. Then, from the top menu bar, choose “WinPE Creator.” Select it to continue.
- When you select a drive, your computer will detect the attached device and display whether it is USB or CD/DVD. If you do not have a storage device on hand, you may also save the ISO file to a local drive and then burn it to a storage medium later. Once you have picked an option, click “Proceed.”
- Connect the WinPE bootable disk to the PC. Restart your computer and press the Esc button repeatedly to go into BIOS. Set it so that the PC boots from “Removable Devices” or “CD-ROM Drive” instead of Hard Drive. Press “F10” to save and exit the BIOS menu.
- Install and Open EaseUS Partition Master. Select the hard drive or solid-state drive to erase. Then right-click and select “Wipe Data.”
- Set the number of times to erase data. You can only set it to 10 at a time. Then, press “OK”.
- A message box will appear telling you that “A computer would restart after the disk erase is recommended”. Click “OK” to continue.
- To start wiping the data, click “Execute the operation” and then “Apply.”
Use VMFS Recovery
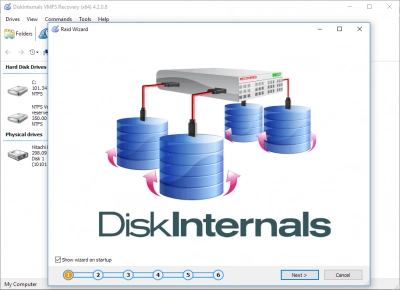
The best VDR alternative is DiskInternals VMFS Recovery; it comes with more advanced features, runs on all Windows OS versions and editions, and includes an intuitive recovery "Wizard" that guides the user throughout a recovery process.
DiskInternals VMFS Recovery stands out among all VDR alternatives and is very easy to use. Some impressive features of the DiskInternals VMFS Recovery utility software include:
- Reads VMware VMFS file system
- Reads both good and corrupted VMFS drives
- Supports vSphere and ESXi/ESX Servers
- Step-by-step Recovery Wizard
- Export the retrieved files via FTP or save them locally to another drive
- Supports all features of DiskInternals RAID Recovery
Also, DiskInternals VMFS Recovery can recover various data formats, regardless of how they got lost. It features two "Scan" modes to dig deep into the selected drive and recover every bit of data that has been previously saved on the drive. Here's a guide to recovering VMware (VMDK) files using DiskInternals VMFS Recovery.
How To Use DiskInternals VMFS Recovery
Firstly, download VMFS Recovery from the official web page and install it on a working Windows PC. This software utility can run on any Windows OS system running version 7.0 up to the newest version 11.0, and it also supports Windows Server OS from 2003 upwards.
Step One:
With the software installed on your PC, connect the disk that contains the corrupted VMDK files you want to recover, then launch VMFS Recovery.
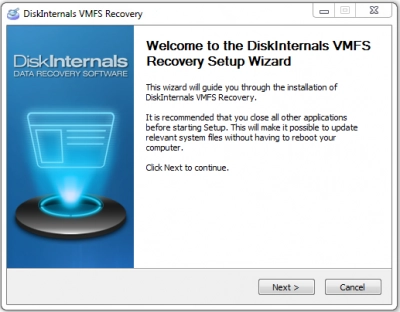
Tip: You can access the disk via SSH connections, iSCSI or Fiber Channel interface connections, or booting Windows to ESX / ESXi from an external drive and then launch the VMFS Recovery utility.
Step Two:
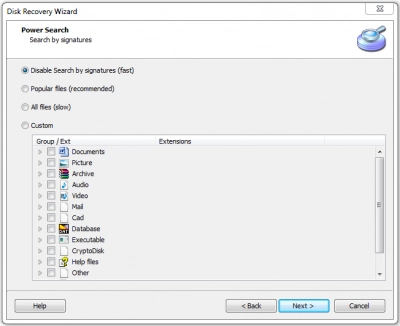
The Recovery Wizard would launch automatically to guide you through the process; simply select the disk with the files and choose a scanning mode - Fast Recovery Mode or Full Recovery Mode.
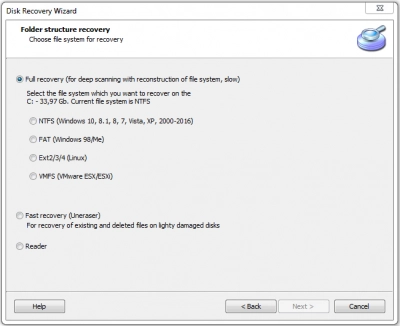
Fast mode scanners are quicker, but Full Recovery mode takes more time and is the most efficient choice.
Step Three:
Allow DiskInternals VMFS Recovery to scan the disk and discover all the files you have ever saved on it. At the end of the scan, you’d be presented with all the files you’ve ever saved on the drive, with the deleted/lost ones indicated with a RED asterisk.
Step Four:
You can preview the recovered files, but to save them back to another storage, you must upgrade to DiskInternals VMFS Recovery Pro version, and if you can’t find the files you wanted to recover, you can request DiskInternals Guided Repair Service to have an expert attempt full recovery of your files from the selected disk.
Conclusion
You may manage the partitions on your hard drive with the help of the robust command-line tool known as Windows DiskPart. However, if you try to utilize it sometimes, you can run into problems. I addressed some of the most typical DiskPart problems in this article.
How can I resolve the DiskPart incorrect parameter error?
You could be attempting to clean a disk that is already in use if you receive the "DiskPart has encountered an error: The argument is incorrect" message. You must unmount the disk first, then use the clean command to resolve this.
