What Is a VMware Virtual Machine?
Nobody is safe from severe data loss in systems implemented with the VMware virtual machine application. VMware recovery can become a quite difficult challenge because VMware has no built-in undelete function. Before finding out how to repair VMware disks, let’s learn more about VMware virtual machines.
So, what is VMware data recovery? Every virtual machine runs an operating system (OS) and the applications the OS supports, just like a physical computer. A VMware virtual machine is supported by the resources of the host hardware. Almost every computer or portable device can be used as host hardware for the virtual machine.
Virtual devices usually provide the same functionality as physical hardware does, but are more portable, easier to manage, and more secure. To repair VMware, repair the VMDK key files dedicated to it.
The files dedicated to the virtual machine are usually stored on the storage device that supports VMware (i.e, the same as software, but for virtual machines). The key files that make up a VM are: the configurations file, the virtual disk file, the file containing NVRAM settings, and the log file.
The configuration of the virtual machine can be made via the web or the desktop client. It is easy to install and configure the virtual machine. To repair a virtual machine in VMware by Broadcom, you might need special software too.
How is VMware data recovery possible with VMFS Recovery™?
The VMFS Recovery™ application is a several times faster, more cost-effective way to complete VMware disk repair in comparison with a visit to the data recovery company. VMFS Recovery™ is highly recommended as your primary choice to repair VMware because of its functionality.
The first step of VMware VMDK repair is to scan the file system and look for all the lost, corrupted and deleted data fragments, including the database and office files, images, audio and video files, backups and archives. File system scanning allows the program to restore data fully. Then it implements the special recovery algorithm to collect every fragment of data from the system.
This is how the VMFS Recovery™ works to restore your data.
What do you need to repair VMware by Broadcom and ESXi Server?
The easy-to-understand interface of VMFS Recovery™ will easily guide you when performing VMware data recovery. Below is a simple guide for those who would like to restore all their data in a fast and easy way.
- 1. Open the local or remote disk by clicking twice on it and choose the type of scanning you need. It can be either deep or quick scanning. Choose the location where the data you lost was stored and click on the “Scan” button.
- 2. The quick scan will start automatically, right after you choose the location. Then the deep scan will be continued to find additional files that cannot be found during quick scanning. All the recoverable files will be displayed after the deep scanning.
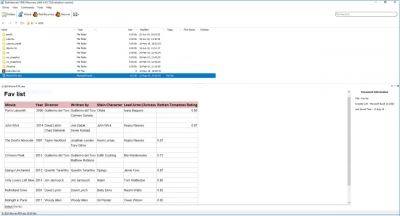
- 3. To preview all the recoverable files, you might mount the VMDK file to the scanning results. After the mounting, the VMDK file will be added to the list of disks. Then you might open it with the reader to see the data available for recovery.

- 4. You can now click the “Recover” button to bring all the files back.
Below you will find the instructions for ESXi server recovery.
- 1. First, try "Fast Scan Uneraser" mode, as it works much faster than a full scan and is sufficient for 95% of all VMFS cases. If it doesn't help, continue to "Full Recovery -> VMFS". The approximate speed of disk scanning depends on your disk system configuration. For a single local drive, it would be approximately 1 Tb every 4 hours. With SSH, the performance would be five times slower.
- 2. If VMFS Recovery™ was able to find the VMDK files you need, mount them by clicking with the right button on one of the required VMDK and selecting "Expert -> Mount as disk". Mounting recovered VMDK files allows one to check the files’ integrity inside the VMDK by using the built-in preview and ensuring that the data was recovered successfully.
- 3. The VMDK file will be added to the disk list as a simple disk image. Open it in a reader mode or scan it using Uneraser\Recovery with the configuration depending on the guest OS file system; i.e., Windows -> NTFS, Linux -> EXT. This will allow you to gain access to files inside and preview recovered data.
Then you will be able to save all the recovered files inside the network storage or hard drive. Start the recovery process of your VMware ESX now by downloading VMFS Recovery™.
