VMware Data Recovery configuration
What is VMware Data Recovery?
Data protection for virtual machines is made quick, easy, and thorough via VMware Data Recovery. This backup and recovery method uses disks. To allow centralized and effective administration of backup tasks, VMware Data Recovery is completely integrated with VMware vCenterTM Server. To enhance storage effectiveness, it integrates features like block-based data deduplication and only conducts incremental backups once the initial full backup is finished. VMware Data Recovery significantly reduces the amount of space needed on the destination disk where the backup data is stored thanks to deduplication and incremental backups.
As backups get older, Data Recovery handles them by deleting them. Deduplication is also supported in order to eliminate duplicate data. The VMware vStorage API for Data Protection serves as the foundation for data recovery. Because of its integration with VMware vCenter Server, you can organize the scheduling of backup tasks from a single location.
VMware Data Recovery is a modern program that covers a large part of users' needs. Its broad functionality allows you to recover data of any complexity of damage. However, setting up this program is tricky. A large number of parameters can cause you to make a mistake at one stage of recovery and you will have to start all over again. You will have to take the time to figure it out. 25-pages guide can take too much time and give no result.
In the meantime, there is a program from DiskInternals. It doesn't require any configuration. The built-in Wizard will guide you through all the steps of the recovery. All you need to do is to set the recovery parameters and enjoy the result.
How to install VMware Data Recovery and use it
You may still utilize the VMware Data Recovery plugin to safeguard your VM data if you are running vSphere 5.1 or an earlier version.
Installing the VMware Data Recovery plugin and appliance is required before connecting to it on port 22024. Make that port 22024 is open on the firewall if one is present so that the vSphere Client can control VMware Data Recovery. In this section, I'll demonstrate.
Please be aware that the VMware Data Recovery plugin cannot be used without an Essentials Plus license.
How to install VMware Data Recovery plugin and appliance
1. Follow the installation process after downloading and running the plug-in installer VMwareDataRecoveryPlugin.msi.
2. Log onto the vCenter server using the vSphere Client. To make sure the VMware Data Recovery plugin is active, click Plug-In > Manage Plug-In.
3. Click File button on the toolbar and select Deploy OVF Template.
4. Click Browse… to select the VMwareDataRecovery_OVF10.ovf file, and click Next.
5. 5. In Name and Location tab, provide the VM name, and in Datastore tab select the datastore where you want to keep this VM. In Disk Format tab, select a format in which to store the virtual disks of the VM.
How to deploy VMware Data Recovery appliance
1. Access VI Client and click Home > Solutions and Applications > VMware Data Recovery. Provide the username and password in the pop-up window, and then click Next.
2. In Backup Destination tab, select a destination where you want to store the VM data. Click Next to complete.
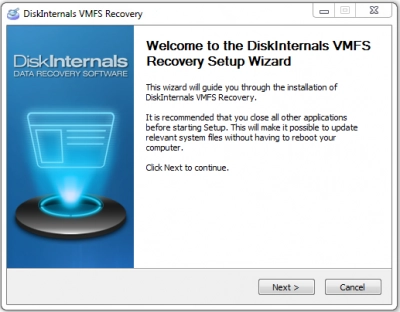
DiskInternals VMFS Recovery
Firstly, download VMFS Recovery from the official web page and install it on a working Windows PC. This software utility can run on any Windows OS system running version 7.0 up to the newest version 11.0, and it also supports Windows Server OS from 2003 upwards.
Step One:
With the software installed on your PC, connect the disk that contains the corrupted VMDK files you want to recover, then launch VMFS Recovery.

Tip: You can access the disk via SSH connections, iSCSI or Fiber Channel interface connections, or booting Windows to ESX / ESXi from an external drive and then launch the VMFS Recovery utility.
Step Two:
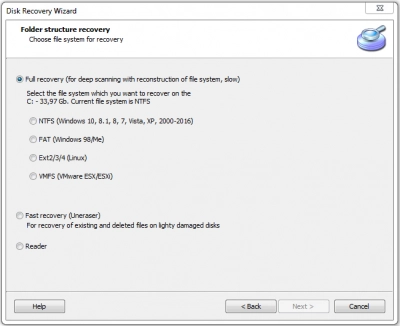
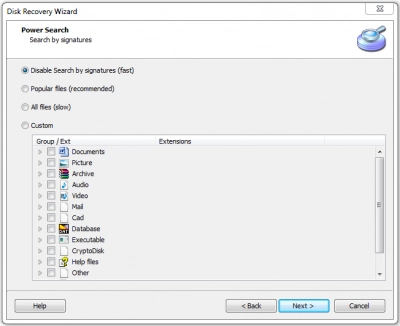
The Recovery Wizard would launch automatically to guide you through the process; simply select the disk with the files and choose a scanning mode - Fast Recovery Mode or Full Recovery Mode.

Fast mode scanners are quicker, but Full Recovery mode takes more time and is the most efficient choice.
Step Three:
Allow DiskInternals VMFS Recovery to scan the disk and discover all the files you have ever saved on it. At the end of the scan, you’d be presented with all the files you’ve ever saved on the drive, with the deleted/lost ones indicated with a RED asterisk.

Step Four:
You can preview the recovered files, but to save them back to another storage, you must upgrade to DiskInternals VMFS Recovery Pro version, and if you can’t find the files you wanted to recover, you can request DiskInternals Guided Repair Service to have an expert attempt full recovery of your files from the selected disk.
